Still working on the Smith-Corona Silent, as time allows. The latest mystery appeared after my previous post, wherein I managed to recover the line-space mechanism thanks to the dead-simple accessible design of this machine. With the platen all assembled and slipped into place, I gave it a twist and...
...it didn't budge.
Uh oh.
I've been puzzling about this for a week or so, swapping in platens from other era machines to try and narrow the issue down. I'd mistakenly thought it wasn't the platen at all, but the little silver cup that it sockets into on the left. This one:
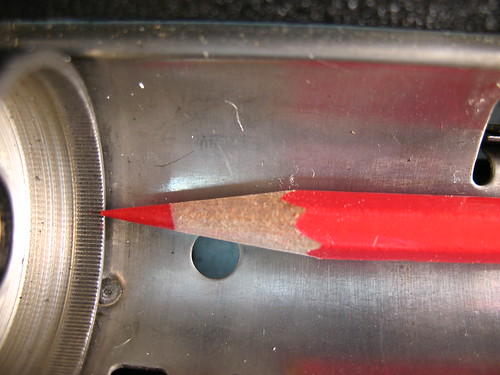
It felt like the platen wasn't seated properly, and was rubbing up against the frame somewhere: maybe it didn't seat far enough into this socket? Maybe that's why the machine was given up for thrift after all? And of course there's always the possibility that I've blundered horribly and bent or broken some essential, tiny part in my haste.
As the platen worked fine in the later-model machine (and vice versa) I'd gotten to the point where I was just going to switch the right-hand knobs and be done with it. But you see, I'd know. I'd know that the machines had cross-donated parts, and I'd know that it was a wrongness. That highly-developed OCD corner of my brain would not let me rest. So what's going on?
In short, a matter of fine, fine tolerances.
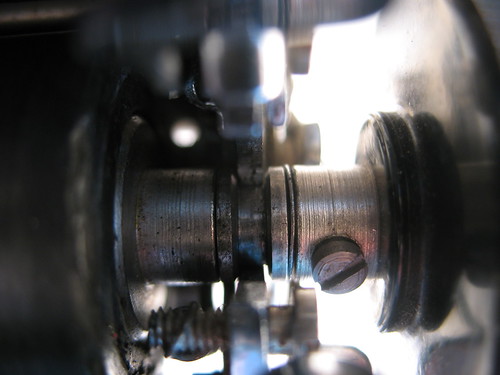
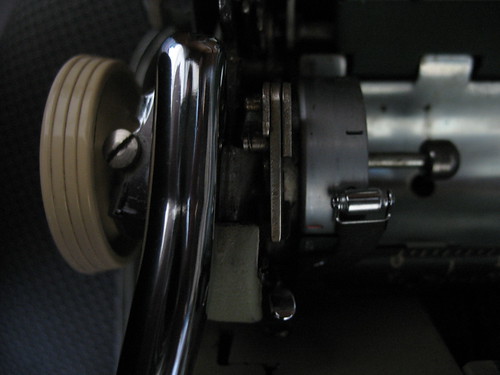
That's the right-hand knob on this machine, in extreme close-up. That little pinched-in area of the shaft fits down inside the frame into a little U-shaped slot. It has to fit just right, and the platen shaft actually rotates inside of the pinched-in collar.
The spring-tensioned lever on the side of the carriage holds the platen down into that U-shaped opening. It must sit there -- there's no other choice.
What you do have a choice on, though, is how you fit that little collar back onto the platen. When I was first exploring this machine, I removed the right-hand knob, and then found the sliding lever animated above. The knob came off happily, and when I lifted out the platen, the collar and a small washer fell off and bounced on my desk. I put them back on and reattached the knob without a second thought.
A shame, too, since a second thought would have got me to change the order of the parts. I had:
washer - collar - knob
And I evidently should have assembled them:
collar - washer - knob
as shown in the picture above. It's a small, but crucial difference. With the parts in the right order, the resistance goes from superhuman effort to butter smooth. I had also managed to move the little wheel that travels over the ratchet on the left-hand side, which I've managed to get realigned now thanks to a dollar-store dental pick and some focused carriage acupressure.
Except for a pair of shell screws that doggedly are resisting going back in (tiny screws, ham hands) the Silent is almost ready for an inaugural typecast.
▼
Wednesday, May 29, 2013
Tuesday, May 21, 2013
Today's Lesson: Smith-Corona Portable Ratchets
I'm making some good progress with the 1948 Smith-Corona Silent that I picked up the other day. One of its most serious problems is a free-spinning platen. I've managed to solve most of the issues just by comparison to a Corona flat-top portable that I own. It's a testament to a good design -- or corporate intertia? -- that I was able to use two other typewriters from twenty-years apart to solve issues with this one. Comparative anatomy for the win!
With the line-advance lever working again, I now have a platen that turns freely. There's a hole in the left knob where a rod should exist, and the typewriter has a funny rattle. What does it all mean? In the case of Smith-Corona portables of a certain age, that means removing the platen. In some machines, this is a recipe for madness -- I'm looking at you, Hermes -- but the Smith-Corona designers and engineers made some excellent decisions that pay handsome dividends to the amateur repairer.
I have a couple of 1950's S-C portables, and although it's not immediately obvious, it is possible to remove the platen with no tools. You need to follow a certain magical spell:
Honestly, it's easier than I'm making it sound: once you've found all the parts you need to move, it's easy. On the 1948 model, the process is much the same,though the whole business with panels and levers is simplified. There's less body in the way, and on the right hand side, all you need to do is slide a little spring-tensioned restraint out of the way.
Here it is in animated GIF form:
(Please excuse the crud on the machine, these are all pre-cleaning pics.)
So, already I'm loving the engineers for making this easy. I pulled out the platen of the machine, and found a part rattling around inside. The missing ratchet-engage lever! I set to work at once figuring out how the parts fit together... and got it backwards. It wasn't until taking that first photo that I realized my mistake.
Unlike Royals and Olympias, and maybe a few other makes as well, Smith-Corona has a "pull to release" mechanism on the ratchet. There's a little rod with a ball permanently attached to the end, and that ball engages or disengages the ratchet. Since I had so much fun with that first animation, here's another one to demonstrate how it works, next to a closeup of the business end of the platen. It's scaled down to fit on the blog: click through for the readable version.
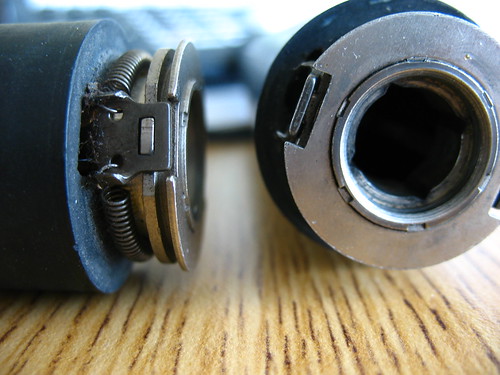
My diagram is overly simplistic, but the general idea is that there are two flaps inside the platen that trigger a pair of tiny spring-tensioned "brake pads" (for want of a better term.) Here's the platens from the two machines here -- my new 1948, my working 1957.
The flaps don't show up in this photo, but they're there, trust me. This design evidently worked so well that it remained unchanged for years. I was able to drop the platen from the older machine into the new one with no problems (which is how I tested that the mechanisms worked OK in the first place.)
In typing position, the brake pads are pressed up against the ridged inner edge of a metal cup that forms the left-hand side of the platen assembly. I laid a pencil in the carriage so you could get a sense of scale, and see the tiny ridges near the tip of the pencil.
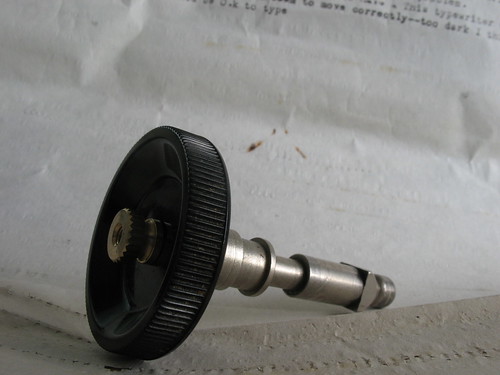
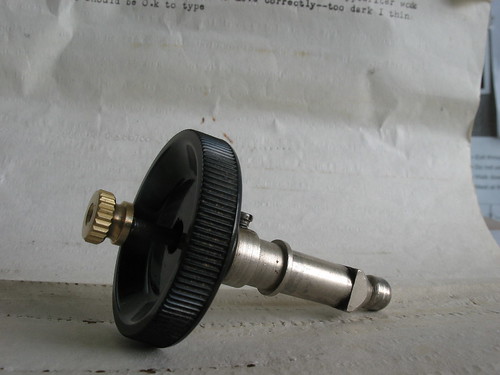
The part that was rattling around inside the platen of my machine was the push-rod that meshes with this mechanism. The end of the rod is threaded, so evidently the old knob or handle that used to fit here got removed at some point in this typer's past. Spending some time in the parts aisle at the hardware stored turned up a brass knurled knob that fits pretty well, though the threading isn't exactly correct. You can see it in these photos showing the knob pieces as they would be assembled in the typewriter.
Normally, the whole mechanism sits in the carriage with the knob attaching to the exposed end that fits through an opening in the side. The squared end of these parts fit into the squared opening in the inside of the platen. Pretty clever!
Now I just need to get the body panels back on -- somehow the frame of the typewriter grew about 2mm after I got the outside panel off -- and figure out what a dangling spring is supposed to attach to, and I think this machine will be back in typing shape.
With the line-advance lever working again, I now have a platen that turns freely. There's a hole in the left knob where a rod should exist, and the typewriter has a funny rattle. What does it all mean? In the case of Smith-Corona portables of a certain age, that means removing the platen. In some machines, this is a recipe for madness -- I'm looking at you, Hermes -- but the Smith-Corona designers and engineers made some excellent decisions that pay handsome dividends to the amateur repairer.
I have a couple of 1950's S-C portables, and although it's not immediately obvious, it is possible to remove the platen with no tools. You need to follow a certain magical spell:
- Disengage the ratchet
- Disengage the line-advance
- Lift the panel on the right-hand side of the carriage
- Find the smallish spring-tensioned lever on the right side that is holding the carriage down and hold it back with your left hand
- With your right hand, gently left the right-hand knob of the platen and pull it up and to the right: it should slip right out leaving you a view like this:
Honestly, it's easier than I'm making it sound: once you've found all the parts you need to move, it's easy. On the 1948 model, the process is much the same,though the whole business with panels and levers is simplified. There's less body in the way, and on the right hand side, all you need to do is slide a little spring-tensioned restraint out of the way.
Here it is in animated GIF form:
(Please excuse the crud on the machine, these are all pre-cleaning pics.)
So, already I'm loving the engineers for making this easy. I pulled out the platen of the machine, and found a part rattling around inside. The missing ratchet-engage lever! I set to work at once figuring out how the parts fit together... and got it backwards. It wasn't until taking that first photo that I realized my mistake.
Unlike Royals and Olympias, and maybe a few other makes as well, Smith-Corona has a "pull to release" mechanism on the ratchet. There's a little rod with a ball permanently attached to the end, and that ball engages or disengages the ratchet. Since I had so much fun with that first animation, here's another one to demonstrate how it works, next to a closeup of the business end of the platen. It's scaled down to fit on the blog: click through for the readable version.
My diagram is overly simplistic, but the general idea is that there are two flaps inside the platen that trigger a pair of tiny spring-tensioned "brake pads" (for want of a better term.) Here's the platens from the two machines here -- my new 1948, my working 1957.
The flaps don't show up in this photo, but they're there, trust me. This design evidently worked so well that it remained unchanged for years. I was able to drop the platen from the older machine into the new one with no problems (which is how I tested that the mechanisms worked OK in the first place.)
In typing position, the brake pads are pressed up against the ridged inner edge of a metal cup that forms the left-hand side of the platen assembly. I laid a pencil in the carriage so you could get a sense of scale, and see the tiny ridges near the tip of the pencil.
The part that was rattling around inside the platen of my machine was the push-rod that meshes with this mechanism. The end of the rod is threaded, so evidently the old knob or handle that used to fit here got removed at some point in this typer's past. Spending some time in the parts aisle at the hardware stored turned up a brass knurled knob that fits pretty well, though the threading isn't exactly correct. You can see it in these photos showing the knob pieces as they would be assembled in the typewriter.
Normally, the whole mechanism sits in the carriage with the knob attaching to the exposed end that fits through an opening in the side. The squared end of these parts fit into the squared opening in the inside of the platen. Pretty clever!
Now I just need to get the body panels back on -- somehow the frame of the typewriter grew about 2mm after I got the outside panel off -- and figure out what a dangling spring is supposed to attach to, and I think this machine will be back in typing shape.
Wednesday, May 15, 2013
Just Following the Code, Ma'am
THE TYPEWRITER CODE (abridged)
Keep a close eye on the keys
Stripes make everything better
It's OK to celebrate your finds in private
But it's more fun to show off
Usually a wasteland of typers except for smoke-smuggered seventies electrics, St. Vincent de Paul came through today with a lucky, lovely find. Elation turned to mild displeasure as I catalogued the issues in the store:
- The ribbon color won't come out of red,
- The ribbon vibrator isn't moving, though it can be moved,
- and ribbon posts aren't advancing, though the mechanism looks clean.
The line-advance lever... isn't- The ratchet is turned off, and there's no button in the left-hand knob
Something's up with the paper bail so it's not touching the platen
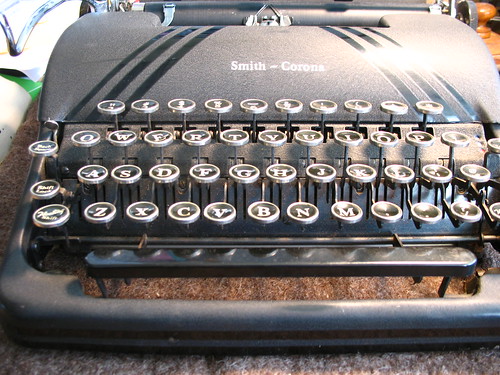
Issues aside, and they are legion, it's Just. So. Pretty. Those stripes! Those keys! All the main typing operations function, and it's still got a full set of tab stops resting on the rack in the back. I'm hoping the problems are recently introduced, and easily reversed. What fun is it only having one or two repair projects waiting on the bench?
Update: In the comments, Rob Bowker correctly noted the similarity between this machine and a flat-top portable.
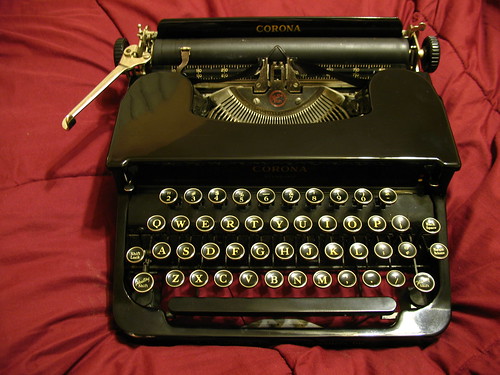
I'm curious - just HOW different are these from the original Corona 4s? From ribbon vibrator through paper fingers all the way to the key tops - it looks the same but in different clothing.He's right of course: except for the newer machine's backspace key moving to the opposite side to make room for the tabulator, there's very little different between these two machines in my collection:
c. 1939
c. 1948
They're so similar, in fact, that I pulled out the flat-top machine last night to inspect the line-advance mechanism. In turn, I found and corrected the problem on the newer machine this morning -- someone had flipped a small spring-tensioned part around its pivot point 180 degrees, and this is the part that engages with the toothed ratchet wheel on the platen. Flip it back into place, and the line-advance lever works properly (almost.)
This also corrects the issue with the paper bail, since that part sat in the way. Now it's back in place and all is right with the world.
The platen still spins freely, though, and this is where the flat-top won't be much help, since it doesn't feature a mechanism to disengage the ratchet. I removed the left knob from the newer machine just to see if I could make some progress, and I can force the ratchet to re-engage if I push the shaft into the machine with a fingertip. I know all the parts are in there and working, so I just need to learn how to make them work all the time.
Update 2: I just remembered that my newer Smith-Corona machines have a pull-rod on the left knob to disengage the ratchet, not a push-button. Suddenly this makes all kinds of sense. Looks like I'm off to check the newer machines to see how they work, too.
Anyhow, two mysteries solved already, and I've got clues for a third. A productive twelve hours!
Update 3: And I think I've got just about everything solved. The color-select lever was just jamming up, probably due to the mechanisms not having been moved in how many decades. I shelled the machine to follow the linkages and check for impediments, worked the mechanisms, and now the lever and ribbon vibrator are behaving properly AND the spool-posts are turning. It's a repair trifecta.
I've got positive news on the ratchet front, too, and I'll share that in a future post. Hopefully a typecast!