
With the line-advance lever working again, I now have a platen that turns freely. There's a hole in the left knob where a rod should exist, and the typewriter has a funny rattle. What does it all mean? In the case of Smith-Corona portables of a certain age, that means removing the platen. In some machines, this is a recipe for madness -- I'm looking at you, Hermes -- but the Smith-Corona designers and engineers made some excellent decisions that pay handsome dividends to the amateur repairer.
I have a couple of 1950's S-C portables, and although it's not immediately obvious, it is possible to remove the platen with no tools. You need to follow a certain magical spell:
- Disengage the ratchet
- Disengage the line-advance
- Lift the panel on the right-hand side of the carriage
- Find the smallish spring-tensioned lever on the right side that is holding the carriage down and hold it back with your left hand
- With your right hand, gently left the right-hand knob of the platen and pull it up and to the right: it should slip right out leaving you a view like this:
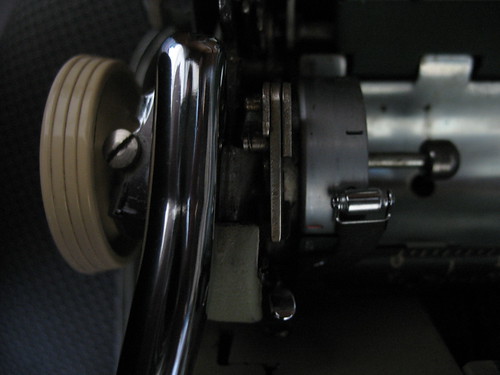
Honestly, it's easier than I'm making it sound: once you've found all the parts you need to move, it's easy. On the 1948 model, the process is much the same,though the whole business with panels and levers is simplified. There's less body in the way, and on the right hand side, all you need to do is slide a little spring-tensioned restraint out of the way.
Here it is in animated GIF form:

(Please excuse the crud on the machine, these are all pre-cleaning pics.)
So, already I'm loving the engineers for making this easy. I pulled out the platen of the machine, and found a part rattling around inside. The missing ratchet-engage lever! I set to work at once figuring out how the parts fit together... and got it backwards. It wasn't until taking that first photo that I realized my mistake.
Unlike Royals and Olympias, and maybe a few other makes as well, Smith-Corona has a "pull to release" mechanism on the ratchet. There's a little rod with a ball permanently attached to the end, and that ball engages or disengages the ratchet. Since I had so much fun with that first animation, here's another one to demonstrate how it works, next to a closeup of the business end of the platen. It's scaled down to fit on the blog: click through for the readable version.

My diagram is overly simplistic, but the general idea is that there are two flaps inside the platen that trigger a pair of tiny spring-tensioned "brake pads" (for want of a better term.) Here's the platens from the two machines here -- my new 1948, my working 1957.
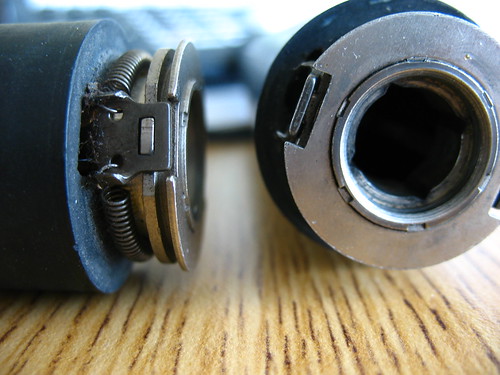
The flaps don't show up in this photo, but they're there, trust me. This design evidently worked so well that it remained unchanged for years. I was able to drop the platen from the older machine into the new one with no problems (which is how I tested that the mechanisms worked OK in the first place.)
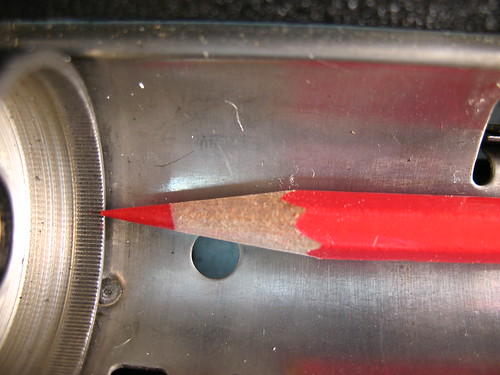
In typing position, the brake pads are pressed up against the ridged inner edge of a metal cup that forms the left-hand side of the platen assembly. I laid a pencil in the carriage so you could get a sense of scale, and see the tiny ridges near the tip of the pencil.
The part that was rattling around inside the platen of my machine was the push-rod that meshes with this mechanism. The end of the rod is threaded, so evidently the old knob or handle that used to fit here got removed at some point in this typer's past. Spending some time in the parts aisle at the hardware stored turned up a brass knurled knob that fits pretty well, though the threading isn't exactly correct. You can see it in these photos showing the knob pieces as they would be assembled in the typewriter.
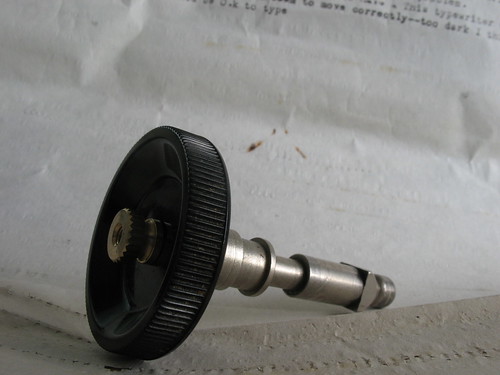

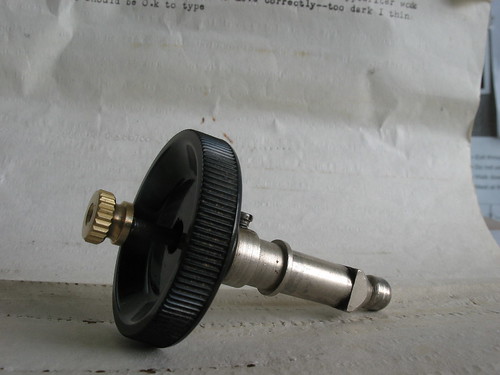
Normally, the whole mechanism sits in the carriage with the knob attaching to the exposed end that fits through an opening in the side. The squared end of these parts fit into the squared opening in the inside of the platen. Pretty clever!
Now I just need to get the body panels back on -- somehow the frame of the typewriter grew about 2mm after I got the outside panel off -- and figure out what a dangling spring is supposed to attach to, and I think this machine will be back in typing shape.
5 comments:
Nice repair job! very informative - you'll have one sweet write once you get it back together. If anyone disparages your brass knob, just tell 'em it's Steampunky! (:
Sweet exposition. Nice gifs!
I'm impressed -- excellent explanation and animated diagrams.
I love the brass knob.
I love typewriters for many reasons, one of them being their ingenious mechanics and the precision machining; and what a good job you've done of illustrating both in this great post!
Very clear, tnx; nice to see how the Corona linefeed-release works. Explains indeed how it is different from e.g. Remington that snaps back to the original spacing. The Corona stays at the new position.
Also think this gives the clue why the Sterling does have the hole in the left platen knob but not the pull-rod (whole knob pulls out). With the removable platen of the Silent, I'm guessing the knob needed to be always stable in place, so the pull rod is needed.
Anoraking... :)
Post a Comment