
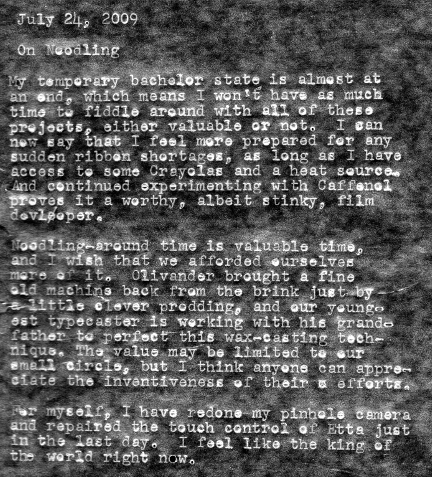
Production note: I was trying to emulate Joe Van Cleve's color-wash technique, but had little luck getting the wax to transfer to the page. My color wash of diluted fountain pen ink made the page a lovely mushy blue, but no letters. So, I fell back on the method demonstrated by his grandson and just scanned the wax paper outright, boosting the contrast in Gimp.
3 comments:
Lovely. And it gives me a few ideas...
I was using my Royal Mercury portable for the wax paper and watercolor wash method. This machine hits the paper rather hard. I had folded a sheet of typing paper (I refuse to call it printer paper) in half, with a sheet of wax paper inside. So you actually get two chances at the wax transfer, but one of them has the letters backwards!
I'd recommend trying thinner paper to type on, so more typing force gets to the wax paper.
I found that doing the watercolor wash was tricky. A wide, flat brush (about 1/2" wide), using the kid's watercolors that are of the dry type in the little metal tins, where you wet each pat with water to activate. Then I daub off most the wateriness from the brush, and carefully wipe the edge of the brush over the wax transfer, in one motion, using almost no pressure. Too much water in the brush, or too much pressure, and the wax letters get rubbed off.
I wonder what would happen if I hit the paper with a hair dryer prior to applying the watercolor wash; perhaps it would help the transferred wax letters to fuse into the fibers of the paper and stick better? Sounds like another round of testing is in order.
Noah and I also played with the idea of a simple watercolor wash on typing paper, dried with a hair dryer, then he typed on it. I posted one of his typings using this method. Sorta like your own custom colored paper.
~Joe
Your wax "negative" looks a bit like a typographic Shroud of Turin.
Word ver: distess: to divorce Tess.
Post a Comment