Showing posts with label hey look another project. Show all posts

Wednesday, April 27, 2016

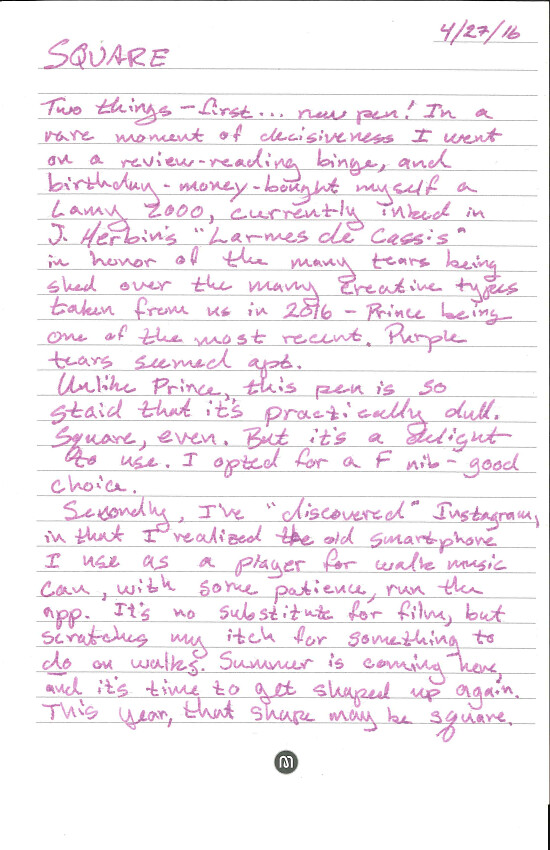
Square

20160427_pencast

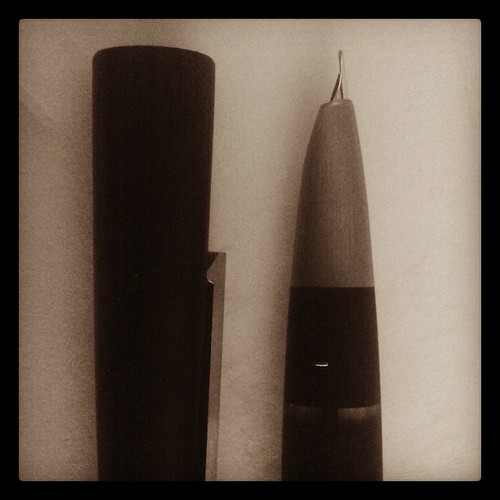
Classy! #Lamy2000

Like many social media spots, I'm hanging out as @mpclemens on Instagram if you long to see random abstract blown-out tilt-shift carefully staged snaps of my breakfast cereal, or whatever one is supposed to Instragramify.

Wednesday, February 10, 2016

Focusish

(Subtitle: "Hey Ted, that was kind of brilliant")

So, this happened tonight:

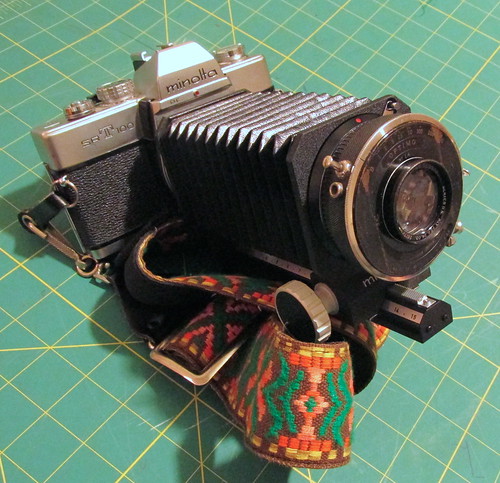
A marriage of old and new

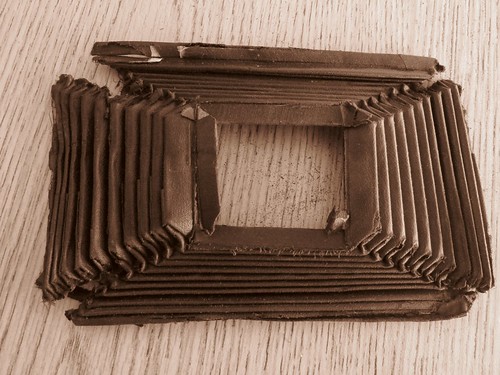
Thanks to a cheapy body cap, some short work with power tools (ooh, power tools) and an old set of macro-photography bellows that I inherited, I bring you operation "Great googly moogly, this might actually work." The bellows adjust for the long focal length of the lens perfectly.

The lens is just resting inside the hollowed-out cap at the moment, since the threaded ring that held it to the board was too large to fit inside the new mount. I'm going to look at options for this -- maybe a rubber ring to friction-fit it into place, with some tape to be extra sure? I don't want this to be a permanent attachment. And I need to get into the shutter mechanism again to figure out how to get the "T" setting working again so it doesn't require four hands to operate.

Dang. I've almost finished something I started. I may have to walk away for a year or two just to pace myself.

Wednesday, January 27, 2016

Focus

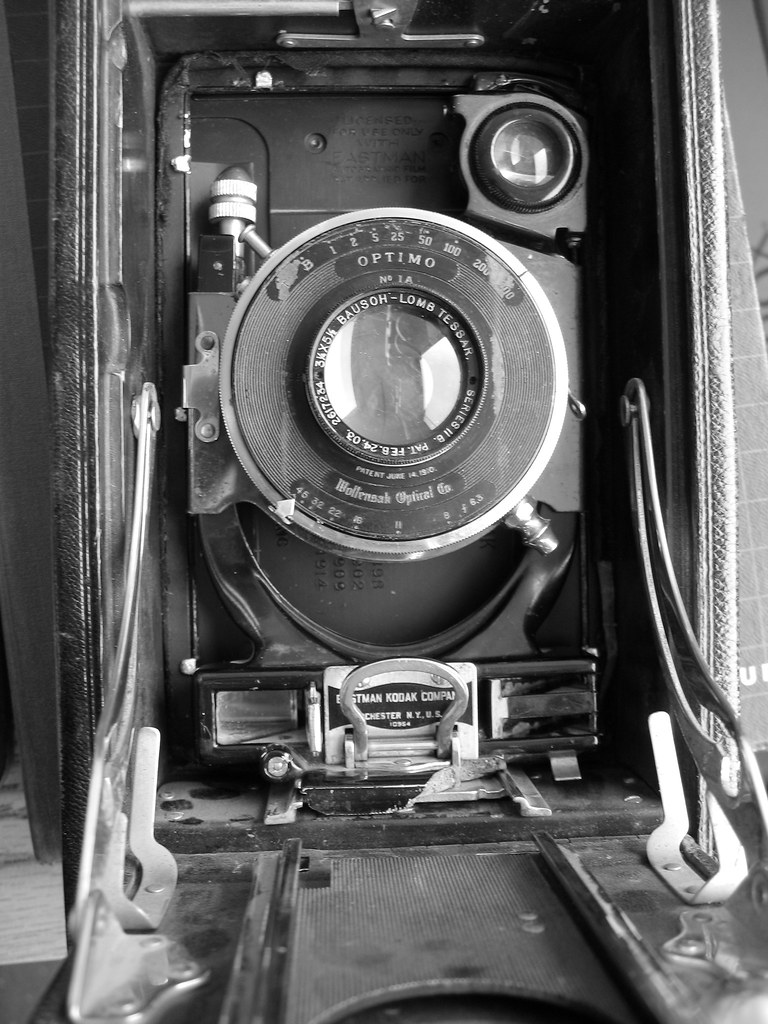
The problem with long-languishing projects left on the shelf is that eventually you need to face them. Lately I've gotten the notion to return to the old Kodak Autographic camera I picked up ages and ages ago, with the grand ambition of resurrecting it somehow. Here it is, sans bellows (see below) and with the lens board retracted.

Number 3A Special Kodak Autographic Model B

Refitting it to take modern 120 film, for example, instead of the long-defunct 122 roll film format. Replace the disintegrating bellows. And, like so many of my good intentions, the scope of the work staggered me. The "to do" list looks like:
  1. Remove lens and clean shutter
  2. Remove and replace bellows
  3. Acquire old 122 spools, somehow fit to 120 spools
  4. Hope to the spirit of George Eastman that the camera is still light-tight
  5. Take photos!

1. Remove lens and clean shutter

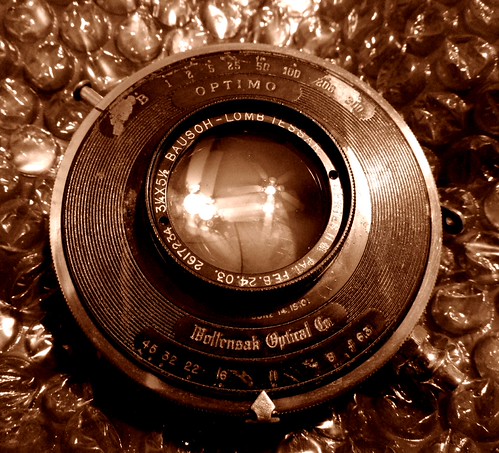
Doable enough, thanks to directions from the Net. Hey presto!

Kodak Autographic 3A Lens


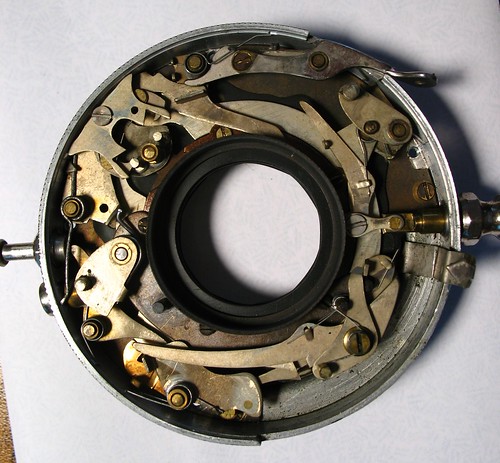
And you may remember "clean shutter" from a long-ago post. Here's the insides, if you want to marvel at it like I do:

Optimo 1A shutter mechanism

Progress: COMPLETED

2. Remove and replace bellows

Removal, check:

Kodak Autographic 3A bellows

Not surprisingly, Kodak didn't want you to remove the bellows from these cameras. Think iPhone battery, but in the 1920s.

These are were riveted into a metal plate around the lens, and are were held in place near the film by a set of menacing looking metal tabs. Oh, and they're so old and dry that they are literally crumbling.

Replacement is simple! First, build a time machine...

The collective wisdom of the Net shows DIY bellows made from leather, or light-blocking curtain fabric, or black Bristol board and duct tape. There's a lot of measuring, evidently. And creasing. And folding. And maybe even a bit of math.

Progress: FULL OF GOOD INTENTIONS IF NOT ACTUAL PROGRESS

3. Acquire old 122 spools, somehow fit to 120 spools

One of the Typosphere's own solved this problem years ago, and far more elegantly than I would have. A trip to eBay for spools and the dollar store for some sacrificial screwdrivers would do it.

Progress: SHAMELESSLY COPY, BEING SURE TO CALL IT A "TRIBUTE"

4. Hope to the spirit of George Eastman that the camera is still light-tight

[Cue sound of needle scratching across a record]

Yeah, about that.

So, aside from the century(?) old bellows having seen far better days, some previous owner mishandled this camera and dropped it right on the front corner. Part of the carriage that slides the lens forward and back is simply gone. And the rangefinder mirrors are cracked and bent. And that's only what I can see.

Replacing the bellows properly looks like a project unto itself. And for a camera that's been traumatized already, that will resist my "upgrades"... well, you can see why this got shelved.

Progress: SHIFT TO PLAN "B"


Enter Plan B

Two things have me pulling the old Kodak and its part of the shelf again, working the shutter on the lens, looking at Bristol board, and pricing black cloth tape...

First, various people shooting by bodging antique or vintage camera lenses onto the front of their DSLR cameras. The results are rather dreamy and lovely to look at, and although the integrated shutter in this lens makes it far from suitable for re-use that way, it got me thinking about the marriage of old versus new.

Second, there's (no surprise) a very vibrant DIY camera movement out there. Joe Van Cleave's examples are lovely pieces of engineering and camera-making, especially his recent box/pinhole model, which got me thinking about old view cameras, to the point where I checked out a monster coffee table book from the library just to get more inspiration. And the one that's currently giving me the most hope, as in "hey I have all that stuff at home" is this Lego-and-paper-and-tape creation.

All of these examples are helping me attain something I so badly need: focus. Not getting bogged in particulars, and remembering that it doesn't take a ton of engineering to make an image.

So, the lens is off, the bellows are destined for the trash bin, and maybe, just maybe, one project will come off the shelf.

Wednesday, February 5, 2014

His Nibs

Life for the past five days or so has been a whirlwind as my older child and wife both came down with a nasty respiratory flu, leaving me ostensibly in charge of meals, laundry, homeschooling, and also juggling work and starting our youth team's track practice. I've lost a few days in there, but as my beloved is slowly getting back to health -- and the youngest child spikes a fever, sigh -- I'm getting my head up again, and going "Holy crap, it's February already" and "it's ITAM, I should type something."

Today was my first day back in the office after that unexpected bout of home-care, and while I try to fend off the coughing from my coworkers* I made the pen decision that got postponed. The final purchase was... a Pelikan M205! As much as I covet the vanishing point, I realized that I'd be sad if I didn't check out a pen that's so highly praised, that requires no fuss to refill, and is designed to be modular -- don't like the nib? Unscrew it an pop in a new one. That's pretty awesome.

It should be here in a week or so, and I had enough left over to pick up a Safari, too. Also highly praised, it meets my criteria for being durable, carryable, and not so precious that I'll freak out if it's dropped (cough Speegle cough.) Also, when our local Borders books was on the verge of closing down, they had about a few boxes of Lamy cartridges in a clearance bin that have been waiting patiently for a pen to juice up. I'm just as excited about this as the Pel, honestly.

Finally, when I managed to get the household stabilized enough this weekend to run out and pick up some groceries, I swung through a consignment store that's dangerously close to my house. Most of the wares are not to my taste or wildly overpriced but what's that down there in that cabinet?

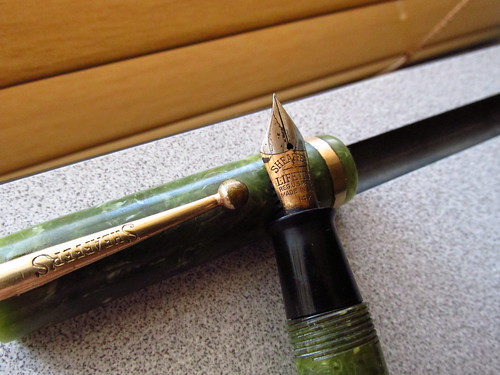
Sheaffer jade flat-top detail
Shiiiiiiny

So, to recap -- set out to pick one pen, wound up with three. Seems about right.

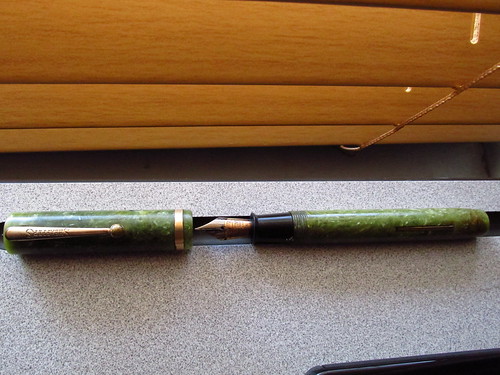
This is an old Sheaffer "flat top" Lifetime pen. "Old," since it's likely from the 1920s-1930. "Flat top" because, well, the end of the cap is flat:

Sheaffer jade flat-top

It's also ink-stained, noticeably brassed in places like the knob on the clip, and the sac literally tore in my hands. What was once a bright green "jade" color is now a mottled pea-soup, which are all known issues with these guys. I also really, really like it. It's grown on me, and with a coat of the same carnauba wax that's so effective on enameled typewriters, it's regained some of its old lustre, if not its color. And soon: it'll have some friends to join it.

* Seriously: stay home if you don't feel well. There are no medals for being the office martyr to the plague. Stay the hell home. I get completely germophobic at this time of year.

Wednesday, May 15, 2013

Just Following the Code, Ma'am

THE TYPEWRITER CODE (abridged)


Keep a close eye on the keys

Pretty little daisies, all in a row

Stripes make everything better

Type-faster stripes

It's OK to celebrate your finds in private

Be Silent!

But it's more fun to show off

Another problem child


Usually a wasteland of typers except for smoke-smuggered seventies electrics, St. Vincent de Paul came through today with a lucky, lovely find. Elation turned to mild displeasure as I catalogued the issues in the store:

  • The ribbon color won't come out of red,
  • The ribbon vibrator isn't moving, though it can be moved,
  • and ribbon posts aren't advancing, though the mechanism looks clean. 
I suspect a common cause, which will probably mean shelling this machine to see what's up.

  • The line-advance lever... isn't
  • The ratchet is turned off, and there's no button in the left-hand knob
  • Something's up with the paper bail so it's not touching the platen
A size 3 knitting needle will easily fit into the opening, though, so maybe an exploratory poke is in order. It's handy to have hobbies that intersect with one another.

Issues aside, and they are legion, it's Just. So. Pretty. Those stripes! Those keys! All the main typing operations function, and it's still got a full set of tab stops resting on the rack in the back. I'm hoping the problems are recently introduced, and easily reversed. What fun is it only having one or two repair projects waiting on the bench?


Update: In the comments, Rob Bowker correctly noted the similarity between this machine and a flat-top portable.
I'm curious - just HOW different are these from the original Corona 4s? From ribbon vibrator through paper fingers all the way to the key tops - it looks the same but in different clothing.
He's right of course: except for the newer machine's backspace key moving to the opposite side to make room for the tabulator, there's very little different between these two machines in my collection:

c. 1939
Corona Standard typewriter, c.1939

c. 1948


Another problem child


They're so similar, in fact, that I pulled out the flat-top machine last night to inspect the line-advance mechanism. In turn, I found and corrected the problem on the newer machine this morning -- someone had flipped a small spring-tensioned part around its pivot point 180 degrees, and this is the part that engages with the toothed ratchet wheel on the platen. Flip it back into place, and the line-advance lever works properly (almost.)

This also corrects the issue with the paper bail, since that part sat in the way. Now it's back in place and all is right with the world.

The platen still spins freely, though, and this is where the flat-top won't be much help, since it doesn't feature a mechanism to disengage the ratchet. I removed the left knob from the newer machine just to see if I could make some progress, and I can force the ratchet to re-engage if I push the shaft into the machine with a fingertip. I know all the parts are in there and working, so I just need to learn how to make them work all the time.

Update 2: I just remembered that my newer Smith-Corona machines have a pull-rod on the left knob to disengage the ratchet, not a push-button. Suddenly this makes all kinds of sense. Looks like I'm off to check the newer machines to see how they work, too.

Anyhow, two mysteries solved already, and I've got clues for a third. A productive twelve hours!

Update 3: And I think I've got just about everything solved. The color-select lever was just jamming up, probably due to the mechanisms not having been moved in how many decades. I shelled the machine to follow the linkages and check for impediments, worked the mechanisms, and now the lever and ribbon vibrator are behaving properly AND the spool-posts are turning. It's a repair trifecta.

I've got positive news on the ratchet front, too, and I'll share that in a future post. Hopefully a typecast!

Monday, January 21, 2013

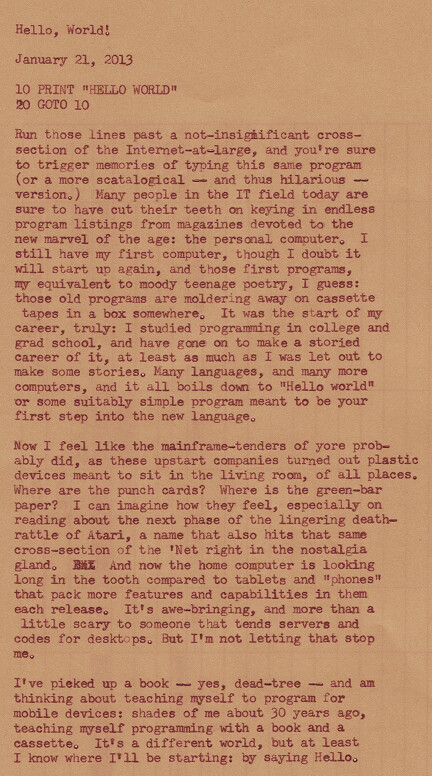
Hello, World!

20130121_typecast

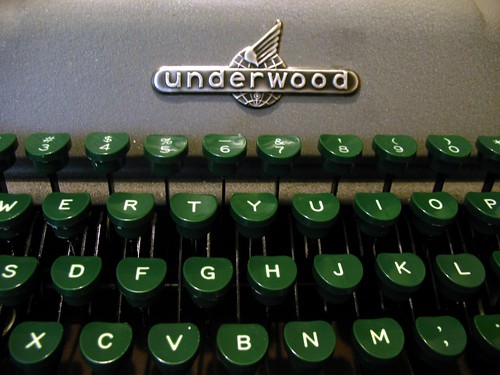
Typed on a 1957 Underwood Universal (from the post-ENIAC age)
Underwood Universal, c.1957


What I didn't mention in the typecast is that this means I'm also dipping my toe into being a mobile-computing-device-owner, although I have yet to desire or need a "smart" phone. What's driving this decision is mainly my desire to edit my novel, and not having any time in which to do it, or access to the home computer (where the draft resides) when I do have the time. Inspired by this photo of an AlphaSmart/tablet hookup and Mr. Speegle's own foray into the tablet-driven revision lifestyle (and emboldened with unspent Christmas cash from my family) I'm dipping my toes in. So it's all for writing, you see, and not solely gadget lust.

That's my story, anyhow. If you could have told 30-years-ago-me that I've be able, in my lifetime, to have Star-Trek like technology in my lap, and program it, I would have scoffed you right out of my room. Not that I would have been able to hear you over the din of the cassette drive, mind you.

Sunday, June 10, 2012

Shear Impatience

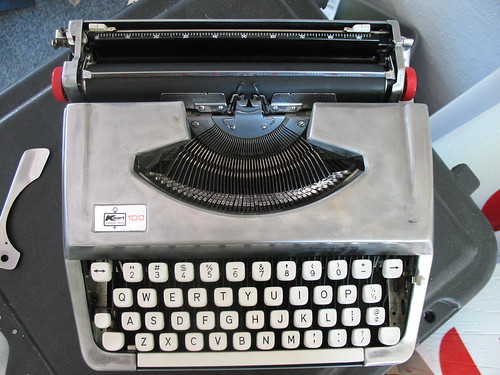
We're nearly there. Only two small setbacks to report on the silver surfer Kmart 100 project. One minor, one not-so-minor.

Silver Surfer, Handless

The minor issue is feet: none of the ones I have laid in will fit in the slightly-smaller wells in the case, necessitating a return trip to the hardware store with the only remaining non-crumbled foot to get a sense of size. I should be able to find something.

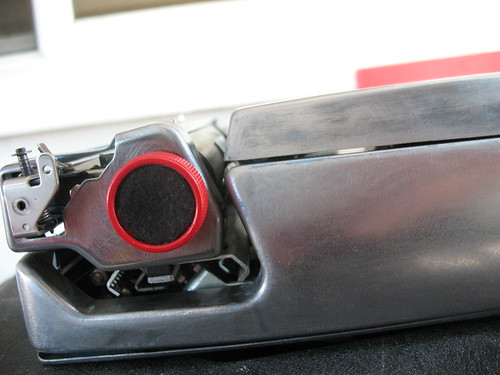
Silver Surfer Knobs

The more serious issue came in replacing the return arm, which had to come off so I could remove the side panel for paint removal. Over-exuberant me decided to over-tighten the small bolt that holds the whole thing together, shearing it apart right in the middle. After filling the air with the heady perfume of weapons-grade profanity, I slipped the broken bolt into the film can which will accompany me to the hardware store. There's some sort of rule here: for any home project that requires N trips to the hardware store, expect to make N+2 trips.

While in the process of fixing things up, I noticed that the backspace mechanism doesn't work, or at least doesn't choose to work with any sort of regularity. This seems to be the fault of a long-broken spring, and I'm not going to fret over it. Maybe that key has a future role to play if I ever yearn to open this machine up again. LED lighting? It could happen.

Meanwhile, I've re-felted the interior panels, obscuring the old blue surfaces. With some extra fabric, I even glued a little inside the repainted knobs, which came out pretty cool, in my opinion. I have a couple of simple decorations I want to add to the machine before I call it "done," but repairing the unintentional damage caused by my zealous tightening and finding suitable replacement feet needs to happen first.

Tuesday, May 22, 2012

Striptease

typecast 20120522
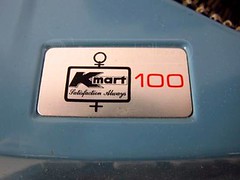
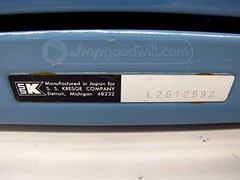
KMart 100 typewriter


Presented on a strip of adding-machine tape on a very slippery platen. Looks like it's time to try the brake fluid trick, too. Typewriter images from shopgoodwill.com

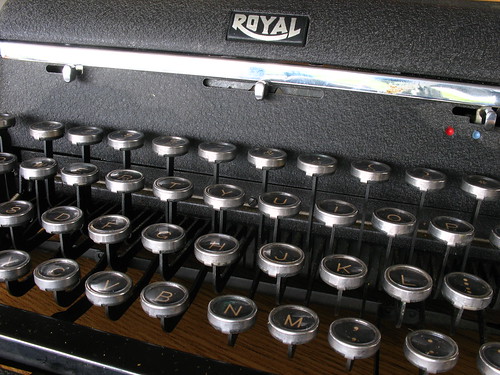
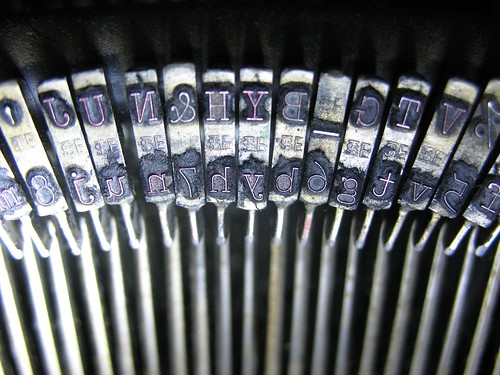
From the keys of a Royal 1947 Quiet De Luxe
Royal Quiet De Luxe, c1947

Wednesday, April 25, 2012

Summer Project

A digital update, since the machine in question is too cruddy to handle a typecast right now...

My wife spotted it at Salvation Army, and I did a follow-up visit: a Royal HH (standard) with my preferred pica typeface, but in a neglected state of affairs. Everything works, but is under a light layer of grime, gunk, dust, dirt, and in some places, rust. Good bones are underneath, though, just waiting to be revealed again.

Crud
Imagine this, but on a whole-machine scale.

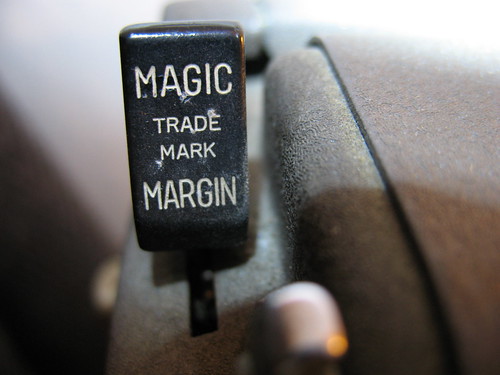
The margins lack magic right now, as their rail is too gummy for them to slide freely, but after a quick consult with Alan, Richard, and Ryan -- all known HH owners -- I confirmed that the margins are settable by hand, albeit with some yoga-like manipulations to apply both the margin release button and reach under the carriage.

Bring the magic
Not entirely magical yet.

I need another standard machine like I need a hole in the head, but my wife was pretty encouraging of this machine, sending me tempting snapshots from her phone and saying things like "I'm not crazy about you collecting, but now I know a good machine when I see one." And this despite the price and our current household budget-tightening. The manager knows me, though, at least by sight, and he offered to knock 50% off the price. Sold!

After an uneventful lug home, the HH is on the sideboard, waiting for the weather to warm up and dry out for real so it can become my summer cleaning project.

Will it look like Alan's when I'm done? That would be nice, certainly. Check back later and we'll see how the project is going.

Thursday, February 23, 2012

Cover Me

Here's some exciting(?) in-progress shots of the cover art for One Last Quest showing my process, such as it is.

Step 1: Sketching
Cover Art: The Carvening

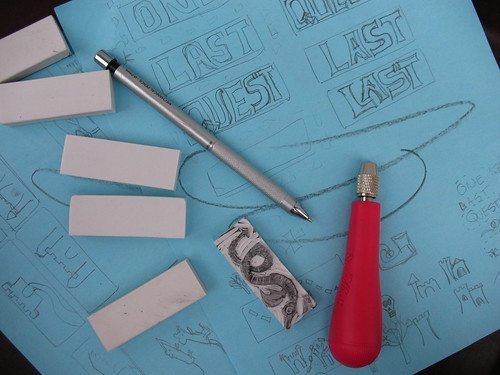
These erasers are pretty small, around 2 1/2 inches on the long side, and about 3/4 of an inch across the short edge. I say "around" and "about" since these came from the dollar store, and are not exactly manufactured to precision specs. The small size is an asset, though, since it forced me to think about what I could accomplish in a small space with my limited art abilities.

I trace out a bunch of rectangles on paper from the erasers, and then spent some time fiddling around with the letters shapes. Since this is a cover for an e-book, I wanted to make sure whatever I made was bold and would show up well when reduced to a thumbnail size. You can see my doodles on the blue paper behind these erasers. I was still trying to figure out what to do with the word "LAST" here, since I didn't like the big gap between the "L" and the "A" but there's not a lot of room to tinker around.

Step 2: Transfer
Initial drawings

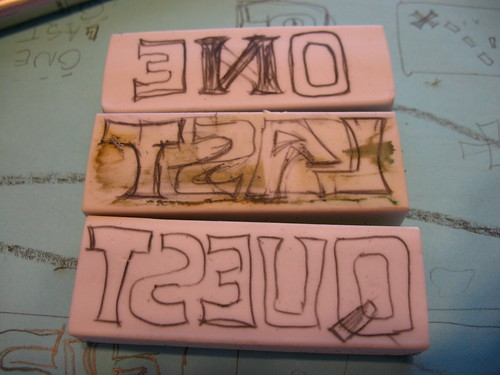
To transfer the image, I placed the blank eraser next to the drawing and then copied a mirror image over. This process was fraught with peril, since my brain kept helpfully "fixing" things as a drew: note the remnants of the "N" in the word "ONE" and the fact that "LAST" was actually erased because I'd done the "L" and "S" the wrong-way around. Voluntary dyslexia is difficult, people.

Only later in the day did I realize that you could press a blank eraser against a heavy pencil drawing and enough of the graphite would transfer over to give me a reference point to recreate the drawings. Duh. (LESSON #1)

Step 3: Outline Cut
Rough carving

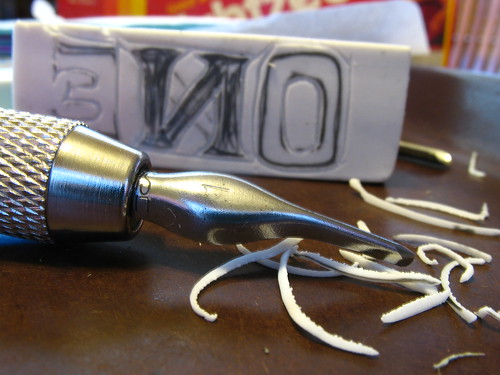
With outline in place, cut away! I used a Speedball Lino Set #1 that I found in a local art store (not Blick, sadly) but these erasers are so soft that you could use anything sharp enough and controllable. If you happen to have a Speedball drawing pen holder, these blades fit inside that, too, which is handy.

Except for the knife blade, all the lino tools have a U-shaped edge, in various depths and widths. This is supposedly the best way to cut stamps, versus cutting directly perpendicular to the surface, as it gives the stamp surface more strength. I stuck almost exclusively to the smallest size since these erasers are so small. And I found it easier to turn the eraser under the tool to make corners, instead of trying to hold the eraser steady and drive the cutter around. This may be horrible technique, but it worked for me. (LESSON #2)

Step 4: First Impression
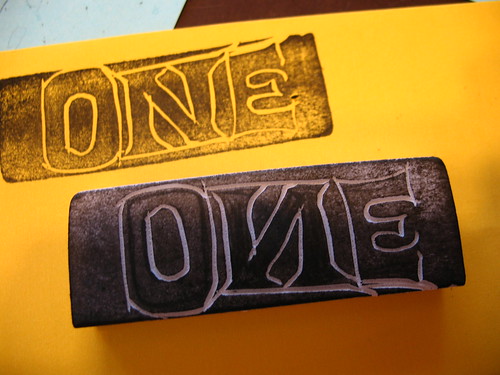
First impression

With all the outline carved out, all the handy pencil marks are theoretically gone from the surface of the eraser, and there's not enough contrast to see what's going on, at least for my middle-aged eyes. Time to break out the ink pad! Just a quick stamp to make sure everything looks OK, proportions are good, I didn't flip the "N" backwards again, etc..

Step 5: Fiddly Carving
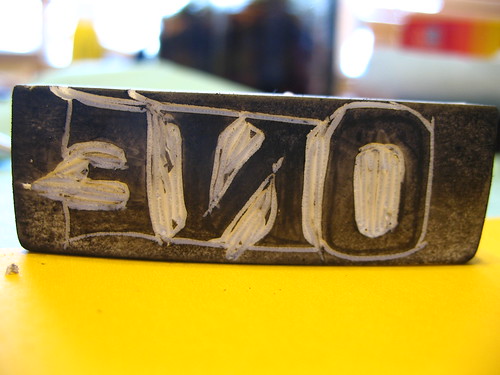
Letter cleanout

First impression passes muster, so using the same tool ("Liner #1") I carved out the narrow spaces inside and between the letters. The leftover ink is a huge help here, since you can see what's left to do. I deliberately wanted to keep the rough-carved look for the art, so I left a lot of the excess in place. I planned to scan these and remove any problems digitally, so better to have too much "extra" stuff than not enough.

Step 6: Final Carve
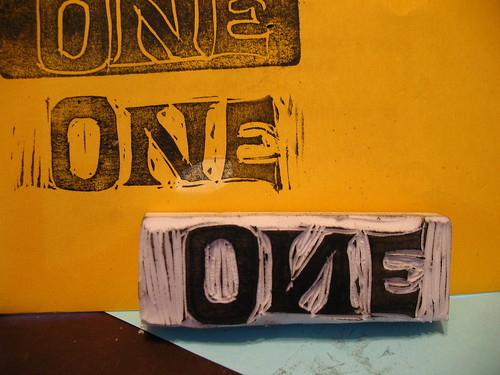
Final stamp

With the fiddly stuff done, I swapped blades and cut away all the rest of the excess. Now repeat steps 2-6 for the other two words, and then sketch up designs for the "icons" on the cover.

I did have trouble pinning down how I wanted the word "LAST" to look. The nice thing about using super-cheap media like dollar-store supplies is there's no real pain in tossing a bad design. Now I have an eraser I can give to my kids for schoolwork once I cut off the inky part.
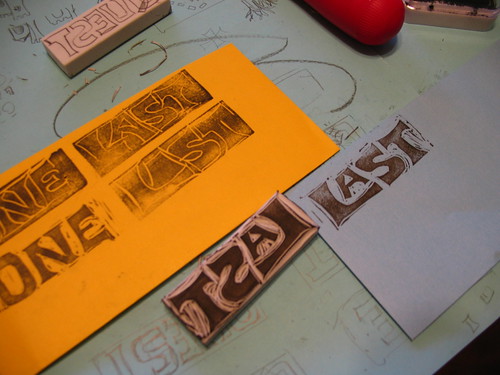
Tweaking "Last"

You can see the rejected outline impression here on the orange piece of paper, and then the stamp that became the final design, with the "A" nested snug.

Step 7: Layout and Scan, and Tweak, Tweak, Tweak
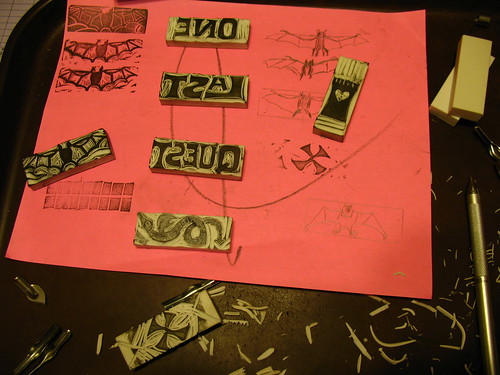
The Carveningination: Aftermath

There were eight total stamps in the cover: the three words, the tower, bat, and dragon, the "X" and the source for the dotted-line path (seen just under the bat stamp above.) I did a few impressions of each stamp on a piece of plain white paper and scanned them, thinking that if I got a bad one, I could just magically copy over a good letter from another impression and drop it into place. Ha Ha! I was so naive. Here's a little tidbit I didn't think about: eraser stamps are very flexible, and they distort slightly when you press them into the page. In other words, the clean bat wings I got from impression #1 would not fit nicely over the smooth bat-body from impression #2, no matter how much I insisted that they should. Live and learn. (LESSON #3)

I brought the whole scan into Gimp and spent most of the day scooting them around a virtual page. I scaled up the words and digitally removed some of the extra print-marks and cutting goofs. The dotted-line path was made from digitally cutting up a quickie grid stamp that I made, and then laying each rectangle down individually. That felt like it took forever. I fudged the colors a bit, and with Richard Polt's permission, used his Royal Quiet Deluxe font for my name.

And the final result:
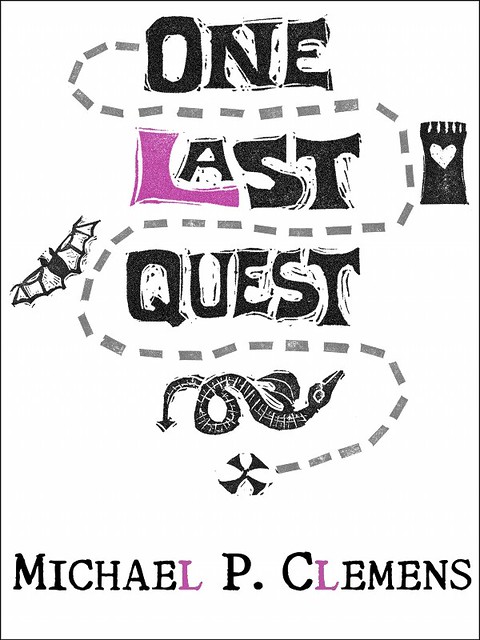
One Last Quest ebook cover art

I'm so pleased with the way that this turned out that I'm considering adding to the collection and doing simple interior stamp illustrations at each chapter head. But then, I've been known to pledge projects here before...

In the meantime, if you are the keeper of an electronic reading device and about a latte's worth of spare change, you, too can marvel at how spiffy this cover art looks on the screen. Oh, and there's some funny words that accompany it, too, if you're into, you know, reading.

You can get a copy of One Last Quest from Smashwords in just about every digital format, or from Barnes & Noble or Amazon if you happen to have one of their readers. All editions are DRM-free, because I'm a tree-huggin' hippie at heart.
Friday, August 26, 2011

Whew! ... Now what?

Lots of things happening here lately:

  • The Hermes "Tropical" I blogged about showed up in the hands of a local eBay'er, and went for over $100 U.S.. Not bad for a typewriter with what I suspect is a broken or jammed tab mechanism. Dishonest, perhaps, but not bad. I'm taking a Critical Eye at some of the less-than-stellar machines in my stable.
  • Speaking of auctions, I put a low bid on a machine at Goodwill's online site, after talking it up on Google+ and Twitter, trying to find an adoptive home. It finally shipped, and is mine now. It's got some issues, including a tricky-ish drawband replacement, and a chip in the frame that needs to be stuck back in place, and some largish paint damage. I've been considering picking up a can of appliance enamel paint for a refinishing job. I think I may have found the machine to try it out upon. Stay tuned.
  • Nearly two years after the fact, I finally finished what I consider "Rewrite 2.0" of my NaNoWriMo 2009 story, One Last Quest. A few in the typosphere have slogged through earlier versions, or the first half of this rewrite. Since this stage has taken so long, though, I don't feel that I've actually read the silly thing start-to-finish. So that's next: convert it to an .epub file and throw it on the Nook. But being done with it: what a feeling! This is easily the longest thing I've ever written. And without question, having the computer read it aloud sped up the rewrite, as my ear caught so many things that my eye missed. (For the curious, I used LibreOffice for transcription with the Read Text extension. Free, and cross-platform.)

Friday, March 13, 2009

Recap

Time to play catchup on some projects I started:
  • Concerning the hiding of typewritten notes inside books, I did cut into the supply of onionskin and do exactly that, writing up about twenty little messages and slipping them deep inside the pages of various titles at the local thrift and used bookstores. This was fun, up until I got very paranoid about the security cameras and what it might have looked like I was doing, and as I'm a regular customer of these places, I didn't feel like getting a hostile warning from the manager on the next visit. On the upside: finally used some onionskin paper.
  • Speaking of hostile warnings, I took both my half-frame cameras out for a shoot-off lately, and just got the prints back. (The hostile warning came from a security guard who didn't like me photographing the local Bank of America office.) Except for some inexplicable cloudiness in the first few shots (fingerprint on the lens?) the all-manual Petri took far superior shots, I expect due to the fact that I could have more control over the exposure. Even a guesstimated setting was better than relying on the aged mechanism in the Pen. I'll try to get some representative shots of both scanned soonish. Clickthing photo tip #1: if you're buying a vintage camera for decent photography, get an all manual one and learn to use it.
  • In other film news, my experiment with a super-cheap DIY stereo camera looks just like that: super-cheap. Even the Walgreen's processing people commented on how blurry they were. I think the lens on those cameras may be made from wax. Clickthing photo tip #2: Dollar store film? Nice! Dollar store cameras? Not so much.
  • Ditto for the yellow-flash Lomography camera, and at this point you should ask yourself, didn't you get what you paid for? Well, yes, and the camera did not exceed my expectations overall. Now and then, though, it took some respectable, accidentally-good shots, also waiting to be scanned. Clickthing photo tip #3: Save your $10 at Urban Outfitters and just get a $3 flash camera from the thrift store and paint over the flash with a dry-erase marker. Same effect, way cheaper. Probably better pictures, too.
  • Speaking of lomography, I also got my pictures back from my other mega-cheap camera that I'm planning on taking to the Temple of the Mouse. It took surprisingly good pictures, though I realized how much I miss having a workable flash. Harsh southern California shadows and mandatory large-brimmed hats on the kids mean lots of faces-in-shadows. I'm still averse to taking the digital camera along, due to very high likelihood that I'll ruin/drop/lose it in the park. I've since found an Olympus Infinity Stylus 35mm camera that may fit the bill. It's got more doodads that I would have preferred -- motorized advance, date-stamp on pics -- but also a few features that I like, including a zoom and a proper fill-flash. Bonus: it claims to be splash proof, and Internet rumor has it that these are very tough little cameras. The Ansco may wind up in the capable hands of one of the kids.
  • I went into Tuesday with Grand Plans and Good Intentions to work on my novel, and instead spent the evening and all day Wednesday riddled with disease. One of my own darling little germ incubators caught me unawares, and I spent all day Wednesday laid up, inches from my novel, without the will or strength to pick the silly thing up and work on it (opting instead for tea and naps, which was far wiser.) I can only conclude that I am actually allergic to my manuscript. To reward myself for surviving, I picked up a bagasse composition book at Staples yesterday as a reward. Bagasse is the polite-company name for "leftover stuff from processing sugar cane" and reportedly, amazing paper can be made from the stuff. Folks, I'm here to tell you that the rumors are all true. I used my composition book yesterday with my cheapo steel-nibbed pen to try and round out some weak scenes in the middle of the novel, and oh MY is it nice. The pen-and-paper obsessed among you need to check this stuff out. (Staples markets this as "Eco" paper. The clerks aren't knowing from "bagasse" so be advised.)
  • Finally, fate seems to be practically hurling slide projectors my way these days. The local thrift store has three projectors at the moment, and another one nearby has a whole bin full of the empty circular trays. So.... tempted... I'm behaving, but I did break down and get two of those hand-held "Pana-Vue" slide viewers, which seems to be holding the lust at bay for now. As I have no actual slides on-hand to play with, I'm only thinking about the possibilities for them. At the moment they're perched on my desk next to Norma Jean. I think I need to fill them with some kind of inspirational quotes or snazzy typewriter art instead of what's in there right now.

Thursday, February 19, 2009

The $2 Stereo

I was digging around the old cardboard box that serves as the tattered remains of my baby scrapbook (before the golden age of acid-free paper, sadly) and I found something that I thought had gone missing: my grandfather's old stereo photo viewer, and some cards that he and my dad shot over the years. Stereo photograpy eventually morphed into the Viewmaster, but there's still a quite active group of people who shoot this way. Since true stereo cameras are sadly priced out of my budget, I started wondering about ways to DIY.

The problem boils down to taking two photos side by side, usually done by snapping one photo, and then moving the camera laterally a few inches and taking another. Lay the photos side by side, cross your eyes, and you should be able to see the result in 3-D. The modern solution now seems to be to strap or otherwise connect two inexpensive digital cameras side by side and take the photos, sometimes even with a custom rig to press the shutter release at the same time. This last aspect is actually key: if you're trying to take a 3-D picture of something in motion, the lapse between side-to-side photos is enough to make a "shiny" spot on the combined image as your brain tries to resolve the conflicting images from each eye. Better to take a still subject on an evenly-lit day. My grandfather fashioned a simple platform for his tripod that he could use like a portable table, but lugging a tripod around is not exactly practical for a casual experiment.

Say "cheesecheese" I'd like to use my grandfather's viewer, though, if only because the eye-crossing thing makes my head hurt after a while. And I am, as you know, incredibly, incredibly cheap, far too cheap to actually buy two digital cameras from Walgreen's and Velcro them together. So here's my first experiment: the $2 stereo. Two disposable cameras from the dollar store, held together with tape and cardboard scavenged from the supply room. The distance between the lenses is slightly wide, but this will supposedly result in something called "hyper stereography" which results in a slightly exaggerated effect. For two dollars it's not worth fussing about. More worrisome is the large gap around the case of on of the cameras, which may let in light. I may wind up with a roll of lots of tree photos, and a roll of sunlight.

Simultaneous shutter release will be attempted by a clever mechanism known as "I have two hands, don't I?" I'm going to head out at lunch today and see what develops.

Post-lunch update: not surprisingly, one of the cameras crapped out after a couple of shots, but I dropped off the film anyway. If it works at all, I'll be inclined to try again with something more durable.

Sunday, October 5, 2008

DIY Typing Pad

(The craft-averse should look away now, perhaps at Olivander's relaunched photo gallery. Feel free to pretend that I'm saying something pithy and observational about the unfortunate collapse of typewriter beauty and the rise of the featureless smooth laptop.)

How to Knit a Typing Pad (I hope)

You need:

* the ability to knit, or pay someone who can
* needles of sufficient size
* a quantity of feltable wool
* a means for felting said wool
* old towels or jeans
* mild washing soap (soak flakes, or a wool wash like Eucalan)
* time, time, time (optional)

This is my first go at making a felted or "fulled" piece. I'm well-versed in the school of "knit a large rectangle" since I have made numerous baby blankets for co-workers' showers, including doubles for the two pairs of twins. I wanted to make this project felted, since the original style was done that way, and felting nicely covers up knitting mistakes, which I fully expect to make. My lovely wife has knit a number of felted items, so any advice related to the actual mechanics of felting is hers, just channeled through me.

Needles and wool:

For my pad, I'm using Lion Brand Fisherman's Wool in brown, mainly because it's cheap for the yardage and being brown, it will hide the stray hairs of my large black dog, which are absolutely everywhere. Needle size recommended is a U.S. 9, and for felted items you want the stiches to be loose and open, so go up a couple of sizes. I'm using U.S. 11 for mine, though I could go for bigger.

Sizing:

You must, must, must swatch here. I figured out that I wanted to make a 15" x 15" pad, because that's about the size of an SM9 case, plus a little fudge factor. With felting, it's easy to make a project go smaller, so plan bigger. Knit up a small swatch (mine was 16 sts x 18 rows), write down your stitches and rows, and measure it carefully. You'll need this later.

Felting:

Supposedly the best way to do this is in a top-loading washing machine, since you really want the agitation cycle. Of course, we swapped ours out some time ago for a water-sipping front-loader, but it still works, just with more time. Take your swatch and toss it into a mesh bag or old pillowcase, taking care to close the opening securely (rubber band it shut.) Include some old towels in the load, or jeans that you don't mind shrinking, or in our case, the cheapo jean jacket that was a quarter at Goodwill and is now "the felting jacket."

Run the machine on its hottest wash cycle and coldest rinse, and wait. You want to catch the machine before it gets into a high spin, because "if it folds over when the machine is spinning, you're screwed." The heat and friction will conspire to give your little swatch a wicked beating, and make the fibers rub together and shrink. Mine took two wash cycles before I couldn't see light through the piece (my highly scientific test) and I thought it looked good. Lay flat on a towel and roll up to dry.

Math time:

Sorry. With your pre-felting swatch measurements at hand, measure the width and length of your new, teeny felted swatch. Figure out how many stitches-per-felted-inch and rows-per-felted-inch you knitted. Multiply these ratios by your target measurements to figure out how many stitches you'll be casting on, and how many rows you'll be knitting. These will be big, upsetting numbers. It's OK.

Pictures of real pads show them to be thick, so I'm planning on actually knitting mine twice as long, folding it over, and sewing the edges together before felting, so I'm doing:

CO 72 sts
K in sts 249 rows
BO

This thing will look like a freaking blanket when I'm done, but that's OK! There will be a lot of shrinking in the wash. And exact measurements are not required: I just rounded up a bit. I can always felt it smaller, or just chop off the edges with a rotary cutter if it's really way crazy too big.

For the real wash, include the soap flakes/wool wash, mostly to keep everything from stinking of wet sheep. Check your project often, since it's easy to get the whole thing too small if you just left it go.

And that's the plan. If nothing else, this should keep my hands busy until November. Stay tuned for the occasional update.